
Quick Start user’s guide for SUMARiS web entry software
Title: Quick Start user’s guide for SUMARiS web entry software
Author: E-IS
Date: October 19, 2019
Copyright: ”Quick Start user’s guide for SUMARiS web entry software” by SUMARiS is licensed under a Creative Commons Attribution-ShareAlike 4.0 International License.
Screens concepts, various view
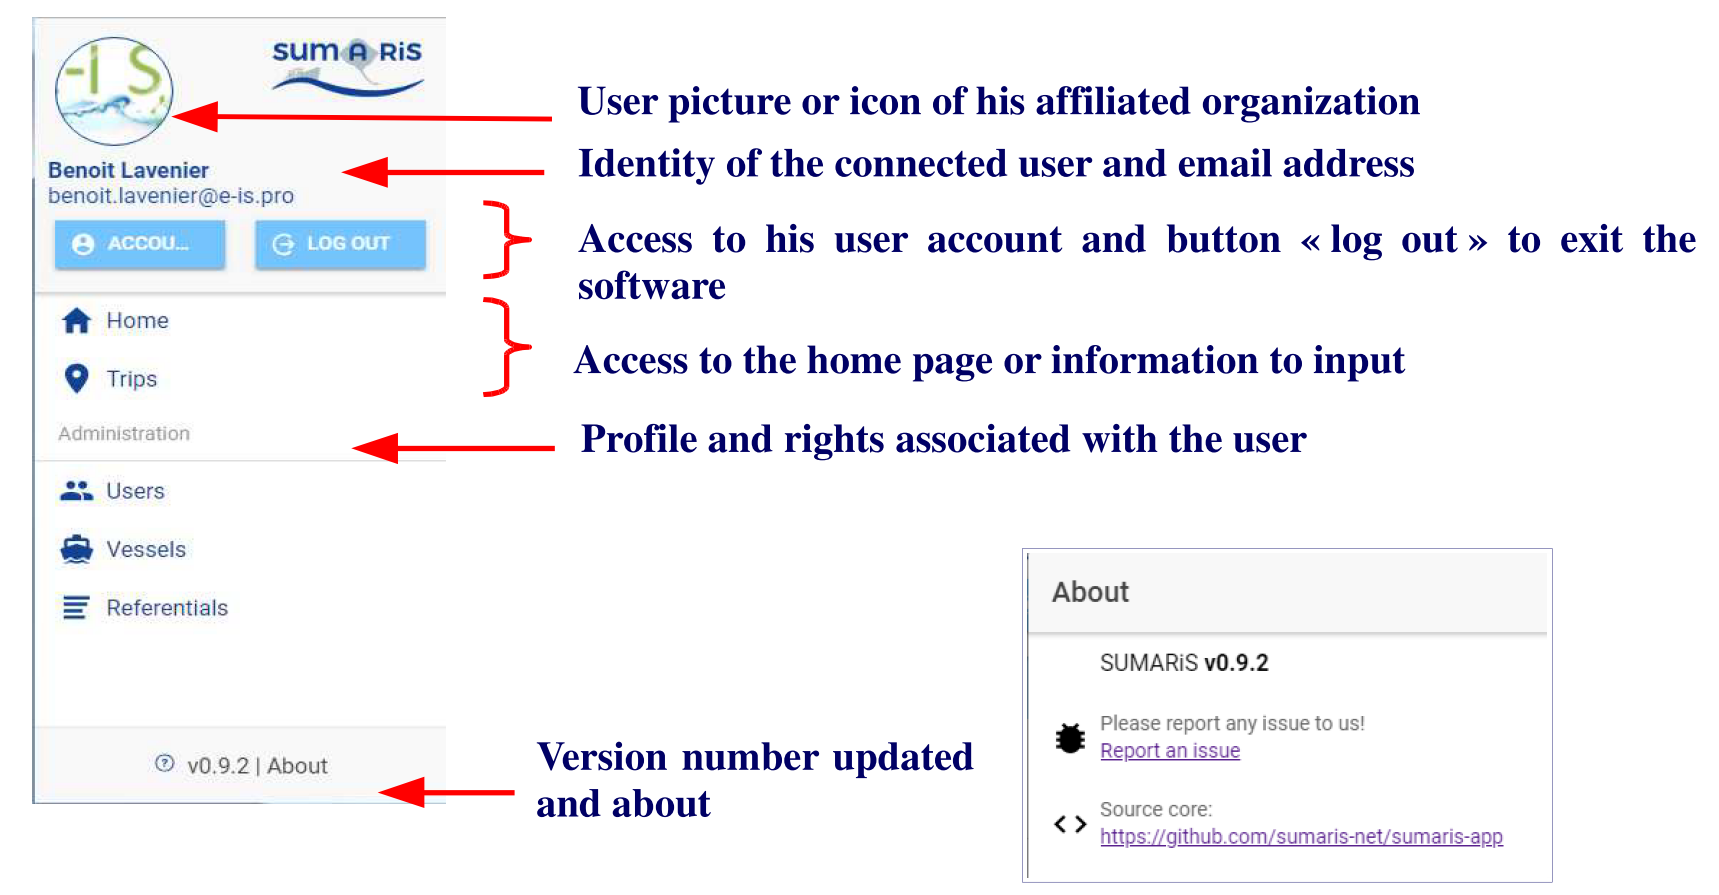
- Details of lateral headband
- Details of primary headband
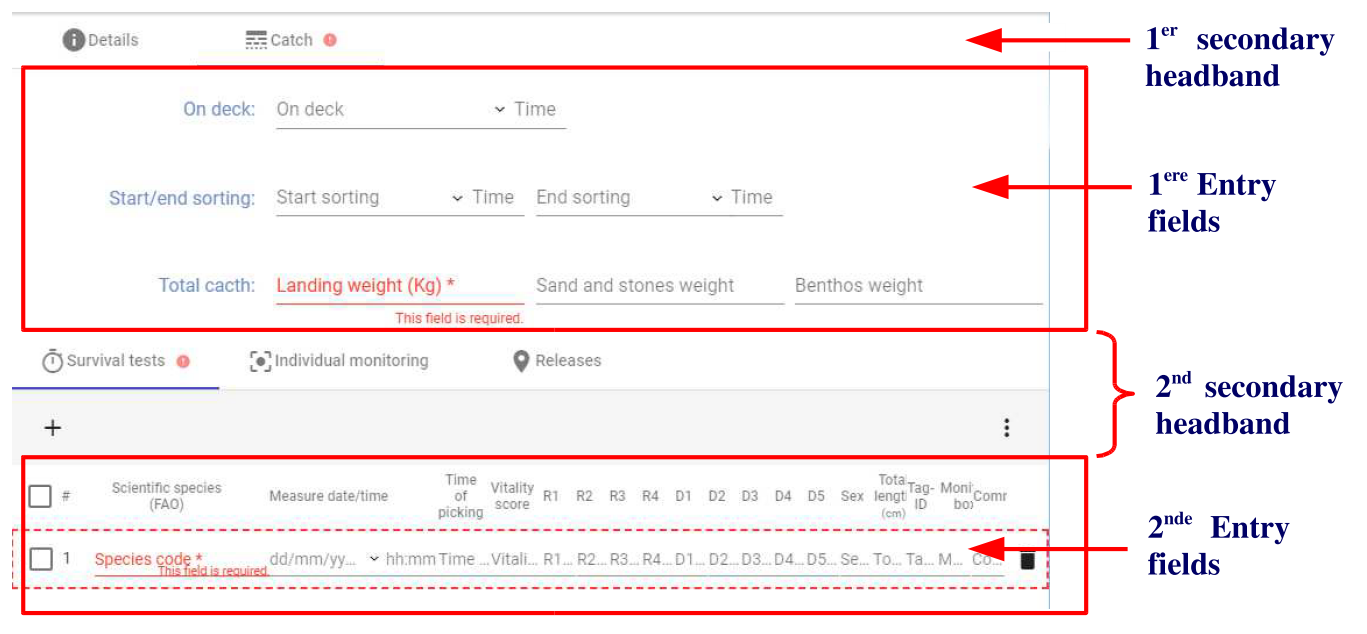
- Details of secondary headband
- Details of the entry fields
Overall design of the entry interface
The main form contains four parts: - The left side, the side band, where the user can find all the information for which he/she has rights (user account, trip information, etc…). - The high side (in blue), the primary band, which indicates at the user the progress of the entry (which vessel, which sea-trip, which haul). - The high side (greyed out), the secondary band, which allows the user to access different tools such as adding information, deleting information, searching for information, cancelling changes (going back), sorting out fields that are visible or not). - The lower part (white) is the entry field.
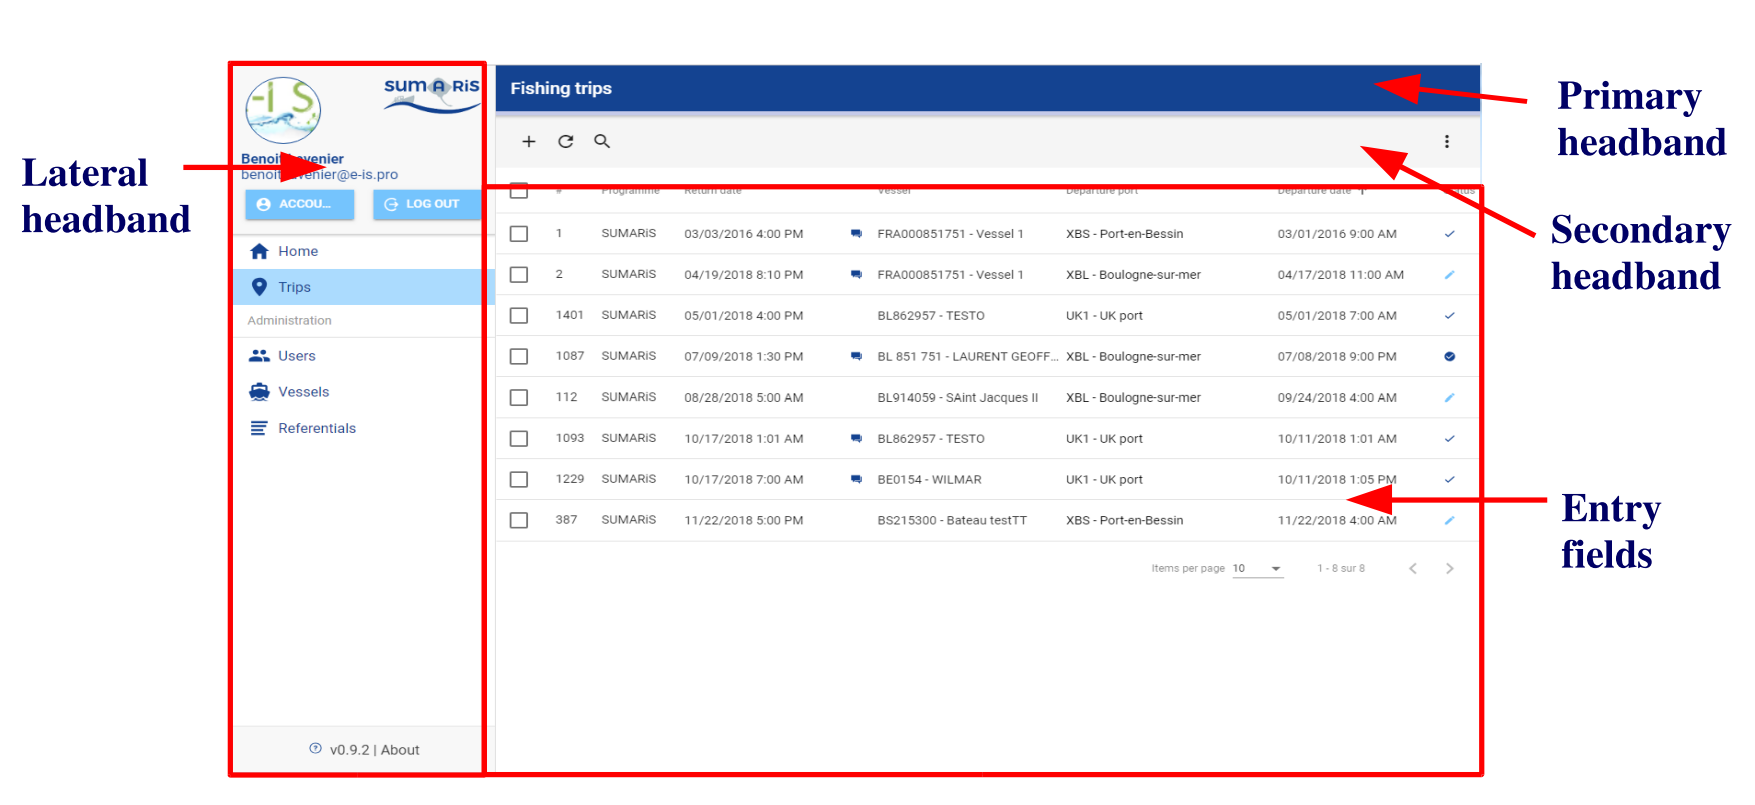
Details of lateral headband
Details of primary headband

This is a reminder area of ongoing entry - the sampled vessel - the start of the trip - the start date and time of the haul.
Details of secondary headband
Providing tools that allow the user to access buttons or tabs associated with entering new information.
The buttons
Each button has a set of actions:
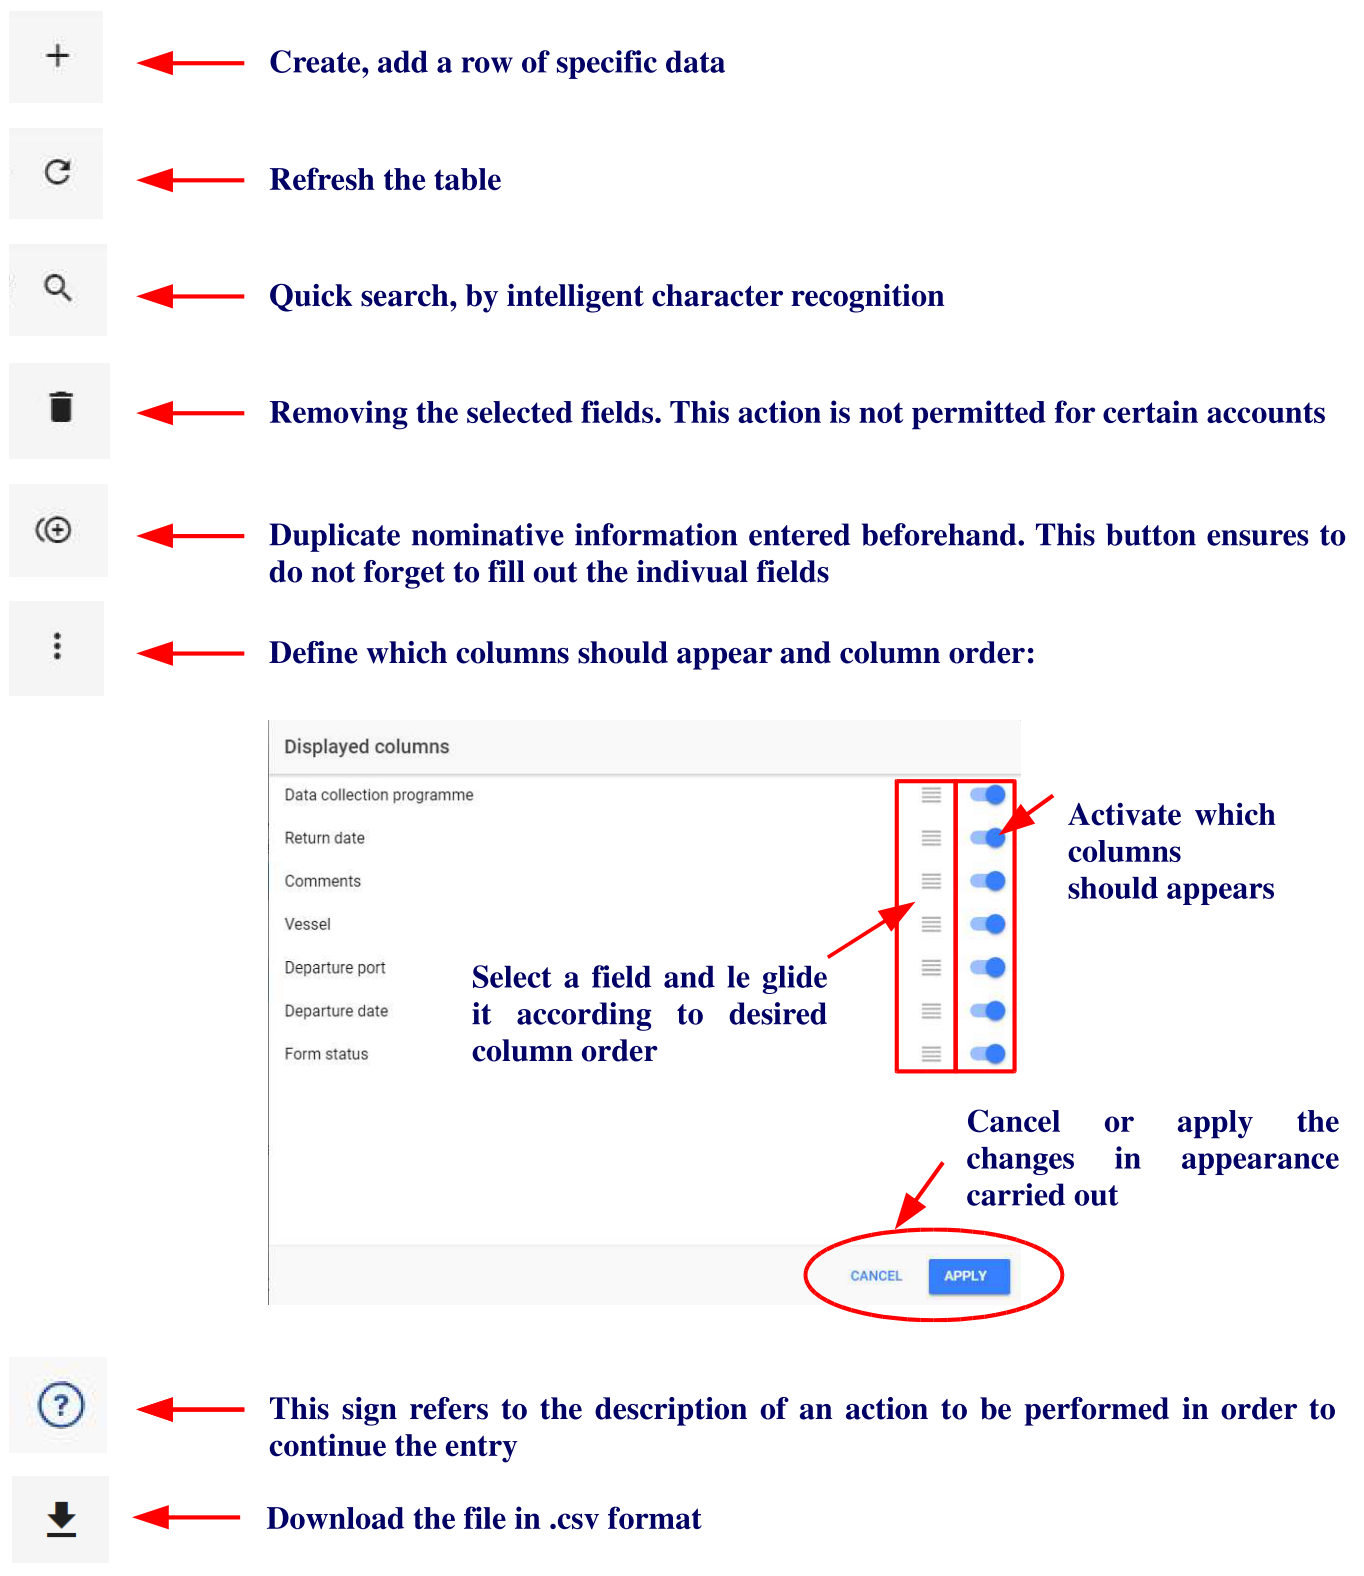
The tabs
Each tab shown depends on the information to be collected. Depending on the data collected, the user will be able to access the different entry sheets by clicking on the corresponding tab.
- From a trip, with detailed information, it is possible to enter or access information on fishing gears used during the trips, to operate fishing operations.

- From a fishing operation, with detailed information, it is possible to enter or access catch information. Note: the total catch weight of any species is required to record fishing operation. Importants:
- When an information is missing, the symbol
 appears in front of the tab where informations are required.
 - The missing value in the appropriate tab is highlighted in red.
- An astérisk * indicates that the field is mandatory and that information is required.
- When an information is missing, the symbol
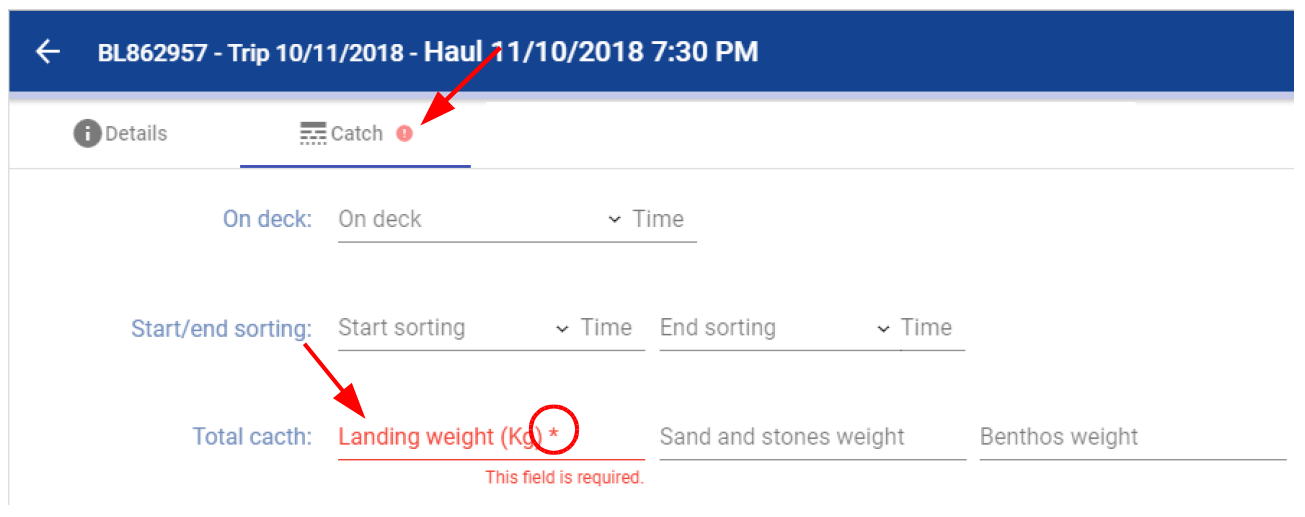
Depending on whether the fishing operation is not sampled (sampling = N), whether it is sampled for capture (sampling = C) or for survival testing (sampling = S), different sub-tabs will be available in the “catch” tab. A new entry area is then accessible along with another secondary band:
- If sampling = C: It is possible to enter or access specific information on the Batch by species and to enter individual measures information.
- If sampling = S: It is possible to capture or access specific survival test information, enter individual monitoring information and information on releases of animal in the sea if necessary..
- If sampling = N: There are no tabs in the catch. Only the total catch weight of any species is required to record the fishing operation.
Details of the entry fields
The entry field consists of several types of objects:
- “Action” buttons: their goal is to close, reset or save the completed entry.
- Drop-down lists: they allow you to select information from a list, such as vessel registration,
- The check boxes: when checked, the line is selected. It is possible to select several lines depending on the desired action.

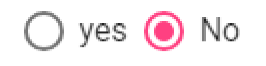
- The Yes/No spaces: the active value matchs the space where the pointer is visible.
- Data groups are associated data, for example, date and time.

-
Some entry sheets take up space on the screen, so a scroll area is visible to the right of the capture area, to move up or down the screen. The mouse wheel can also be used to unroll the sheet.
-
When the number of data available for the same table is important, only a few lines are visible. However, it is possible to change the number of data to be displayed, or to move forward and backward in its data visualization using the arrows below:

- Drop-down lists help to avoid errors and limit the entry time. They use data referential.
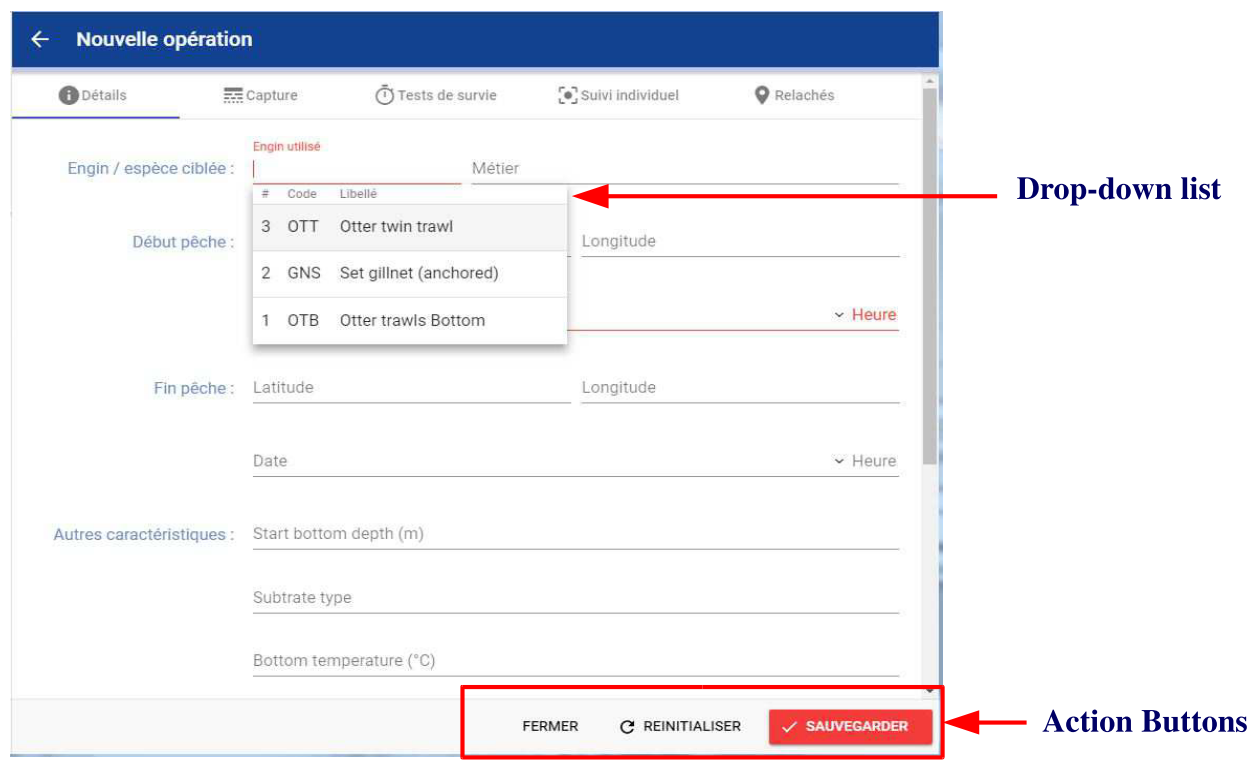
To select information from a drop-down list, use the keyboard arrows and enter it. 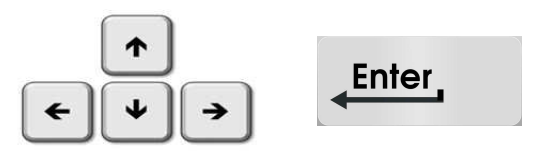
The information may also be entered but an error will be reported if the data have not been entered correctly.
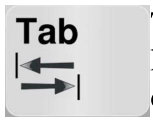
To move from one entry field to the next one, we should use the “tab” key on the keyboard. This key has two advantages: following the field entry order and moving the cursor in the correct place in the next field.